I’ve been working on a class recently and I got to the point in the class that I needed a server in order to run some of my code that I’ve been developing and this server needed to run node JS applications on it so I could continue working with react JS for the class. This is how I installed node JS and got it up and running so I could begin working with react JS on an Ubuntu LXC container inside of Proxmox.
The first thing that you are going to have to do is setup a ct inside of Proxmox with the Ubuntu 22.10 image on it.
The first that we will do is apply updates to the CT with the command
apt update && apt upgrade -y
now we can use the command apt install nodejs mpm to install everything that we are going to need to run React.js apps from the Ubuntu CT
apt install nodejs npm
To verify that we have everything that we need lets ask the server for some version out puts.
node -v
npm -v
npx -v
If all three of the commands return a v number you are ready to continue.
use cd to goto where ever you would like to store your app and we are going to run the command
npx create-react-app my-app
with my-app being the name of your app this will make a folder inside of what ever folder that you are it from.
The last thing we need to due before you can view the page is to start it from the my-app folder
cd [path to my-app]
npm start
now you should be able to go to your server ip on port 3000 and view a React.js page.
Hosting a webpage can be a daunting task, especially if you’re not familiar with the technical aspects of server management. Luckily, Docker Compose offers a simple and efficient way to host your webpage on a server with minimal effort. In this tutorial, we’ll guide you through the process of using Docker Compose to deploy your webpage, step by step. Whether you’re a developer looking to host your personal portfolio or a small business owner seeking a cost-effective hosting solution, this guide is for you. Let’s dive in!
Here are the commands to install Docker, and docker-compose here at the start of 2023
Now that we have Docker, and docker-compose installed on the server, VM, or LXC container. It is time to start making the files that docker-compose will need to setup the nginx container and host the webpage
I am going to make this file in my user folder
/home/[user name]
mkdir /home/[user name]/[site name]
Inside of this folder we need to make a yaml file called docker-compose.yaml
now that you have your docker-compose.yaml file open it is time to start filling this file with info remeber this is a yaml file so spacing matters
The first line we will be adding is
version: '3'
This line specifies the version of the Docker Compose syntax that is used in this file. In this case, version 3 is used.
The Next line is
services:
This line indicates the start of the services section of the file. This section is used to define the containers that should be created by Docker Compose.
The next line will have two spaces at the start of it
[service name]:
This line defines a service. This service will create a container based on the nginx image with the name in this line.
This next line will now start with 3 spaces
image: nginx:latest
This line specifies the image that should be used for the service. In this case, the nginx image is used, with the latest tag. This means that the latest version of the nginx image will be downloaded from Docker Hub when the container is created.
This next lines will have 3 spaces
ports:
  - "80:80"
This line specifies that port 80 of the container should be mapped to port 80 of the host machine. This allows the web server running in the container to be accessible from the host machine.
As you can see from the finished docker-compose.yaml we are going to need two more files for this web server one called nginx.conf to tell nginx how to host the index.html file that will hold the webpage.
I am going to just give you a boiler plate with a title for the index.html file you can place yours here but this one will work for testing.
This is probably the most basic file that one could create as a nginx.conf file but it will get the job done lets look at how it is made.
The first black is called the server block. In NGINX, a server block is used to define the configuration for a specific virtual server.
server {
}
Inside of the server block we need to tell nginx what port to listen on we do that with this line.
listen 80;
Now we need to make a new block inside of the server block called the location block, which is used to specify the configuration for a particular URL location. In this case, the / location is being configured, which is the default location for the server.
location / {
}
inside of the location block we need to tell nginx where to find the the root directory for the server. In this case, it is set to /usr/share/nginx/html, which is the default directory for static HTML files in NGINX.
root /usr/share/nginx/html;
last we need to tell nginx the default file that should be served when a client requests a directory. In this case, it is set to index.html, which means that if a client requests the root URL of the server, NGINX will look for an index.html file in the root directory and serve it if it exists.
here is what it all looks like when it is finished
server {
    listen 80;

    location / {
        root /usr/share/nginx/html;
        index index.html;
    }
}
Now the we have made all the need files it is time to start the docker container using the docker-compose.yaml file.
lets cd to the folder that all the files are in
cd /home/[user name]/[site name]
now run the command
sudo docker-compose up -d
load your we browser and go the the ip of your server and you should see your webpage.
good luck
some other commands that you might find helpful are
sudo docker-compose ps
to view if your container is running and
sudo docker-compose stop
to stop you container from running.
In conclusion, Docker Compose offers a simple and efficient way to host your webpage on a server with minimal effort. With just a few commands, you can have Docker and Docker Compose installed on your server, and easily set up a container running an NGINX web server with your webpage. By following the steps outlined in this tutorial, whether you are a developer looking to host your personal portfolio or a small business owner seeking a cost-effective hosting solution, you can get your webpage up and running in no time. The use of Docker Compose simplifies the process of web hosting and is a great option to consider for anyone who wants to host a webpage without the need for extensive server management knowledge.
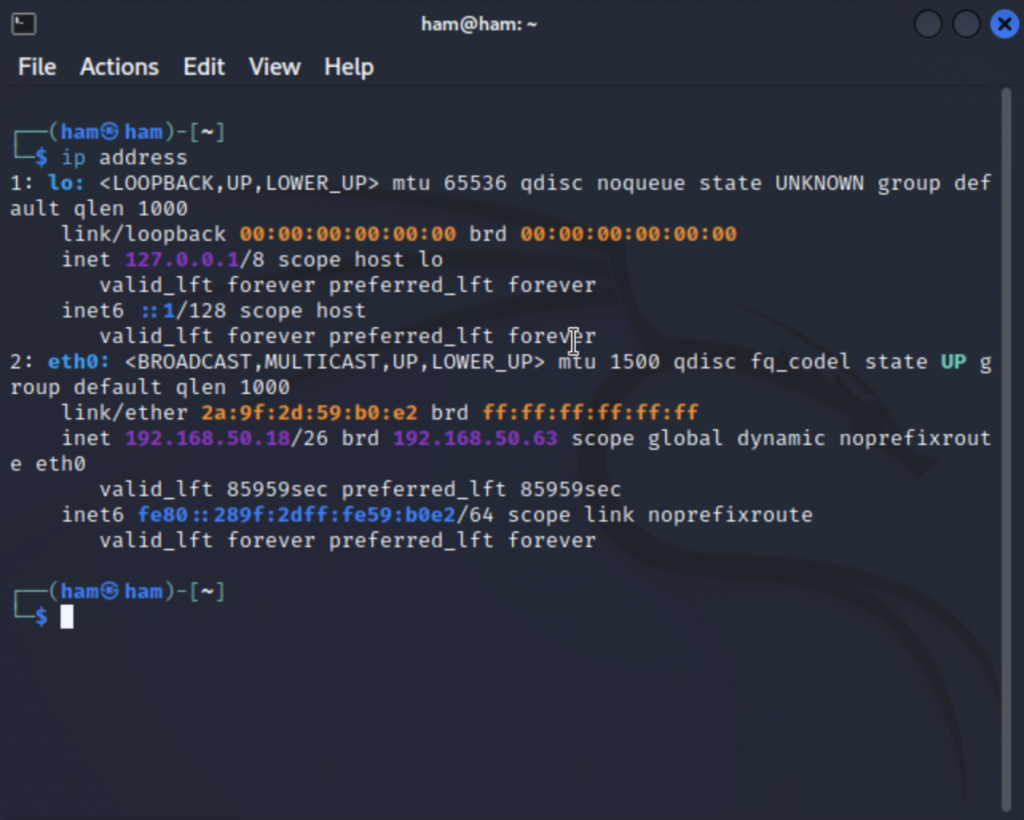
So I needed to capture a four way handshake for a project. But the only wireless card I had that was capable of doing this was the Alfa Networks AWUS036ACH. After I installed Kali on my Proxmox server and plugged in the wireless card as well as passed through the USB I entered the command IP address and found out that the wireless card wasn’t recognized by the computer or VM so this is how i fixed the problem.
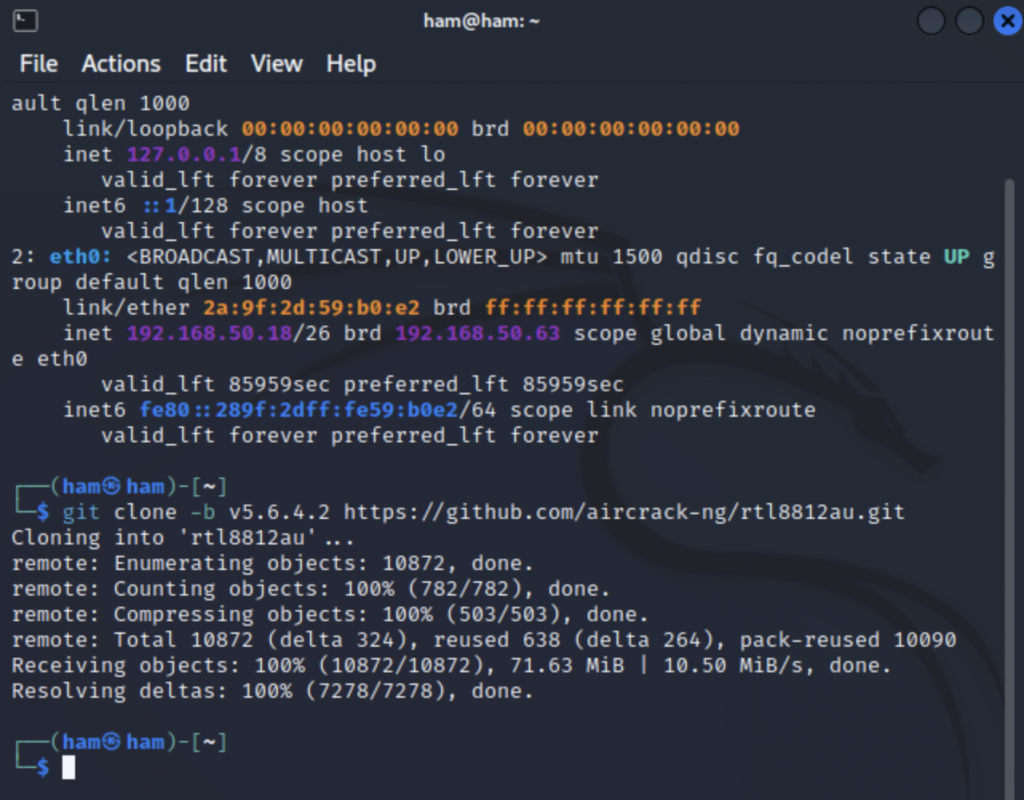
After doing an hour or so of searching on the Internet using Google I found a GitHub repository that was going to work https://github.com/aircrack-ng/rtl8812au
The directions on the GitHub website were pretty useful but I did have if you little hiccups so here is the process I took to load the drivers for the Alfa Networks AWUS036ACH on the my Kali VM
The “-b” option is used to specify the branch of the repository that you want to clone. In this case, it’s the “v5.6.4.2” branch.
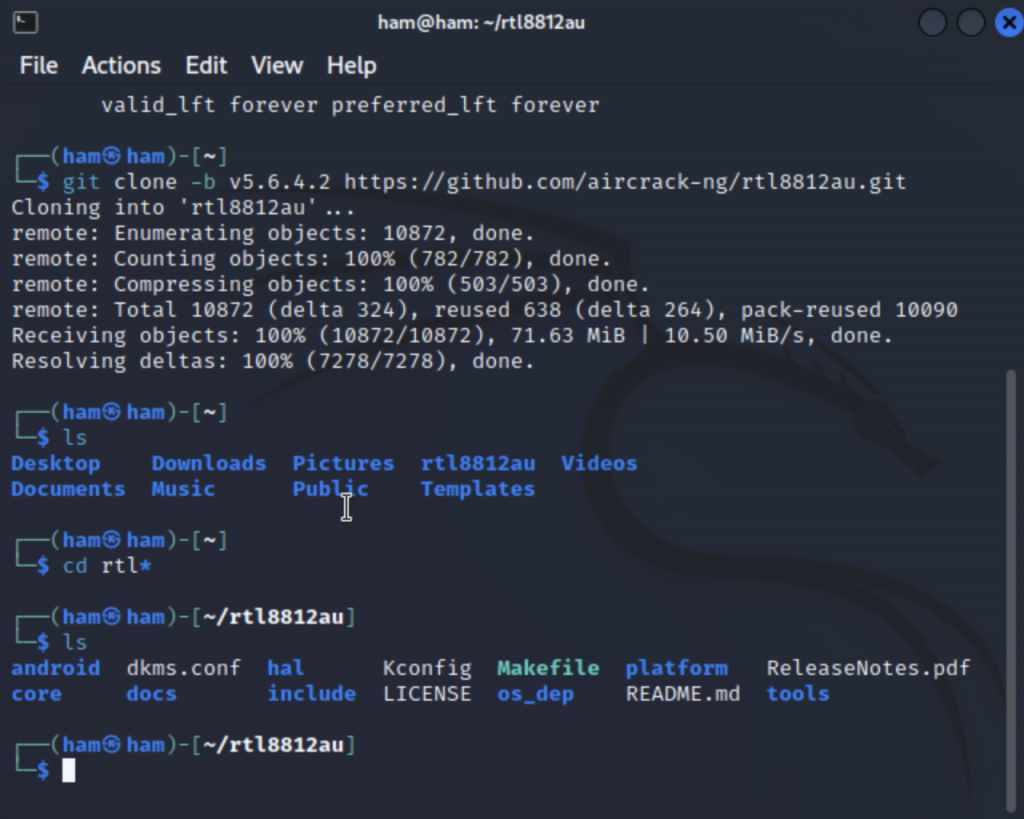
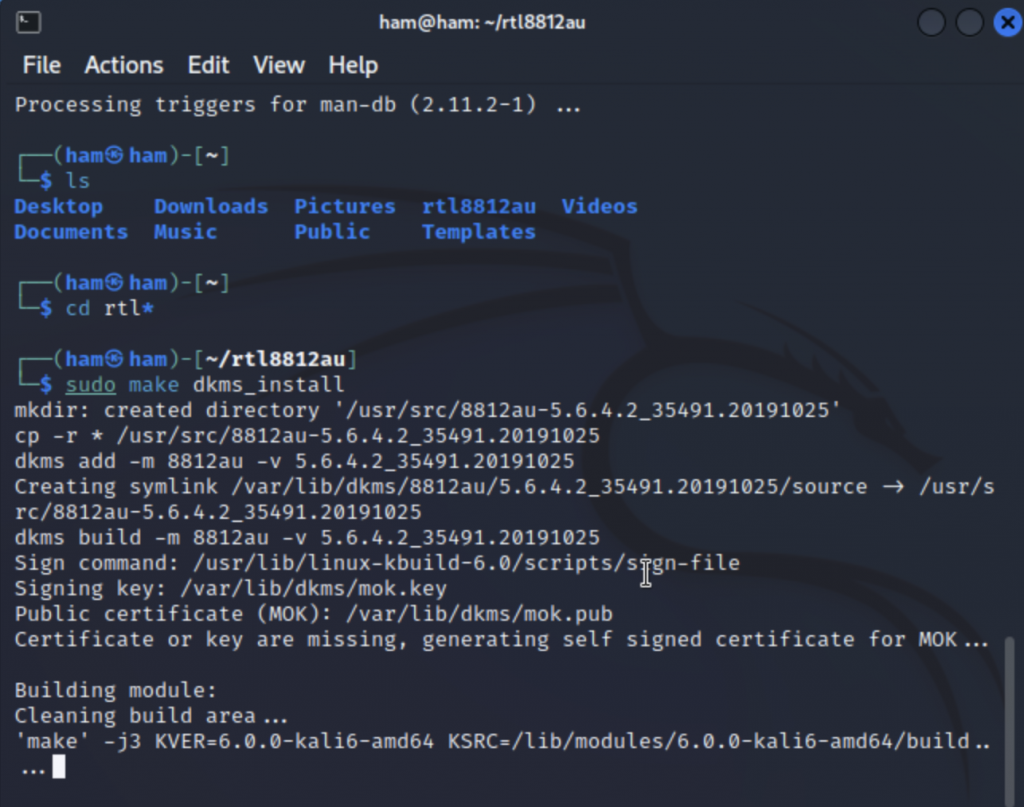
Now I need to navigate to the folder which the driver downloaded to I’m going to first do this by using the LS command to view the contents of the folder that I’m currently in this will allow me to identify the newly added folder name then I’m going to use the CD command to change my directory to the newly added folder.
I am going to use DKMS to install this driver. DKMS (Dynamic Kernel Module Support) is a Linux tool that is used to manage and automatically build kernel modules. It allows for the automatic recompilation and installation of kernel modules when a new kernel is installed or updated.
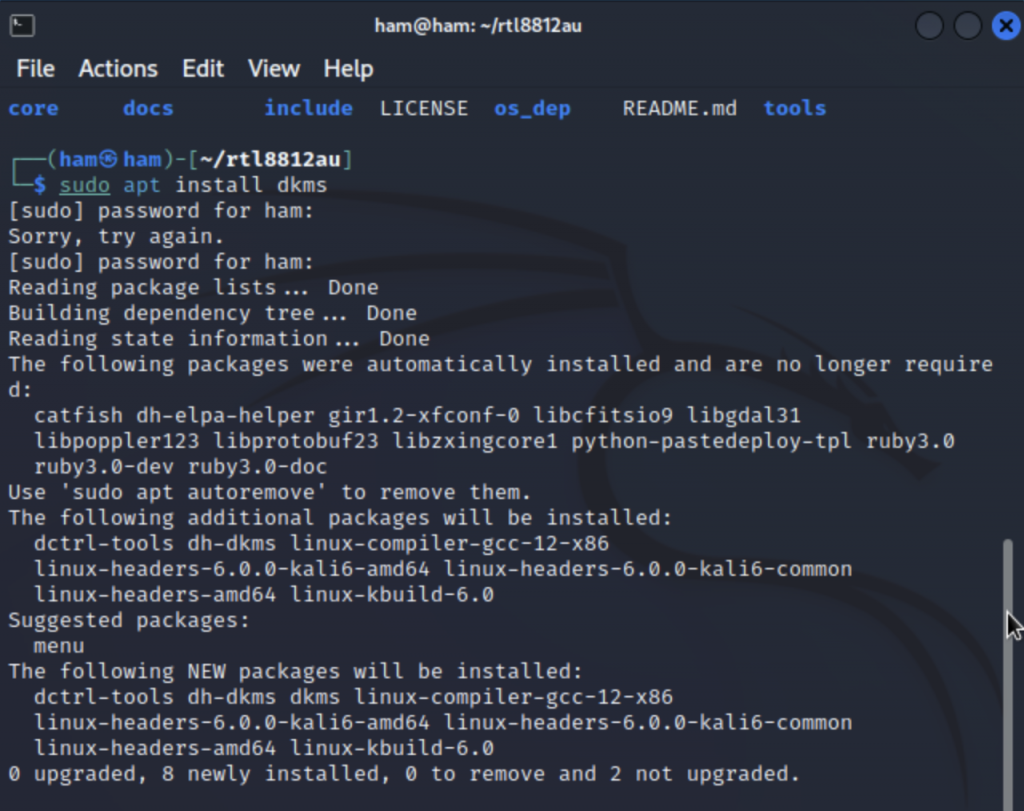
the first this that i need to do to install DKMS is install DKMS on the Kali VM
sudo apt-get install dkms
If you are not already inside of the rtl8812au folder cd there now
now that DKMS is installed it is time to use it to do this we are going to enter the command
sudo make dkms_install
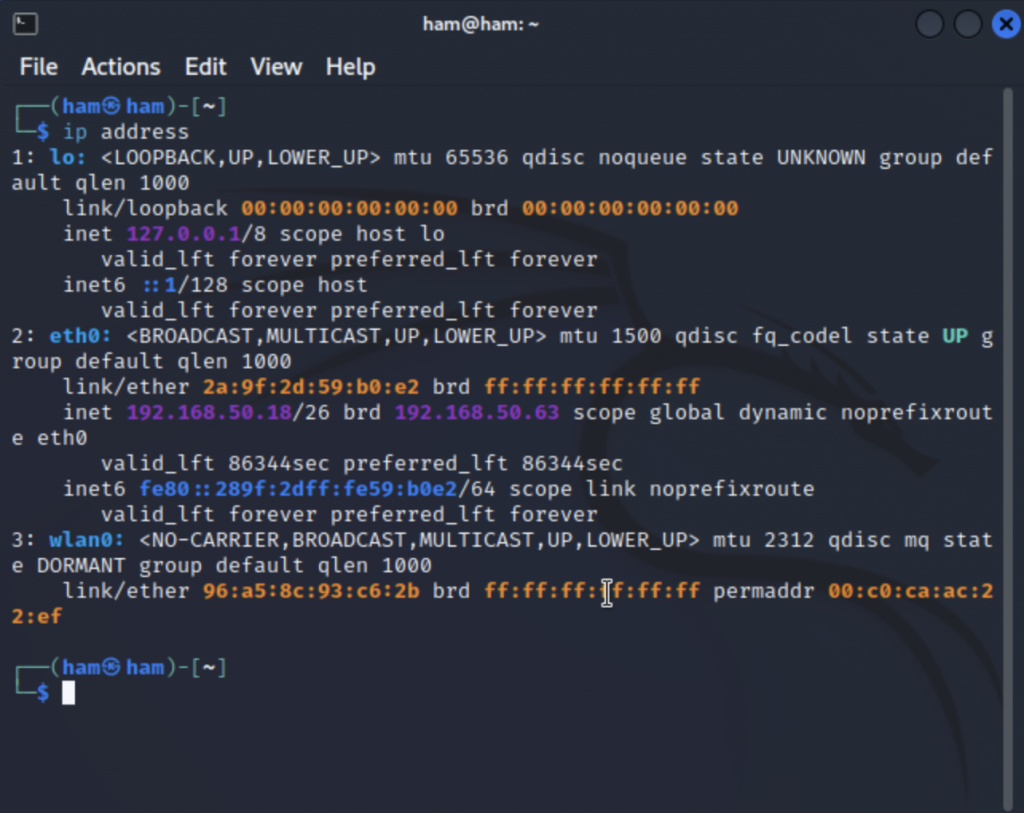
Now it is time to restart ind verify that the wifi card is not working with the ip address commend.