To night we are going to look at how to add a SMB share to Proxmox 7 using just the web interface.
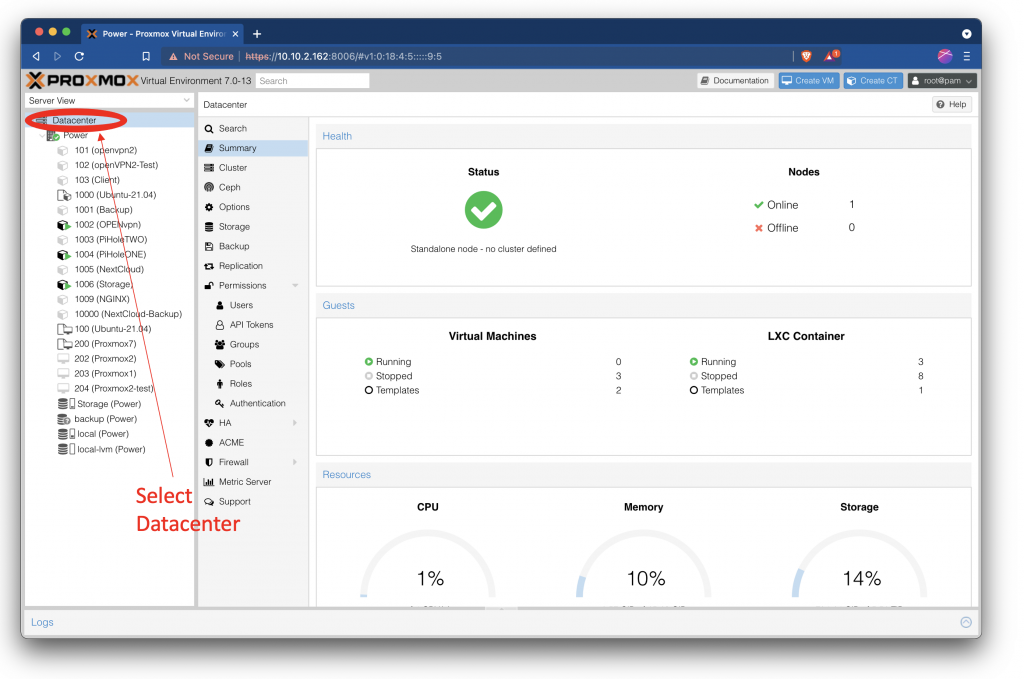
The first this that you are going to want to do after entering your Proxmox web interface is to go to Datacenter.
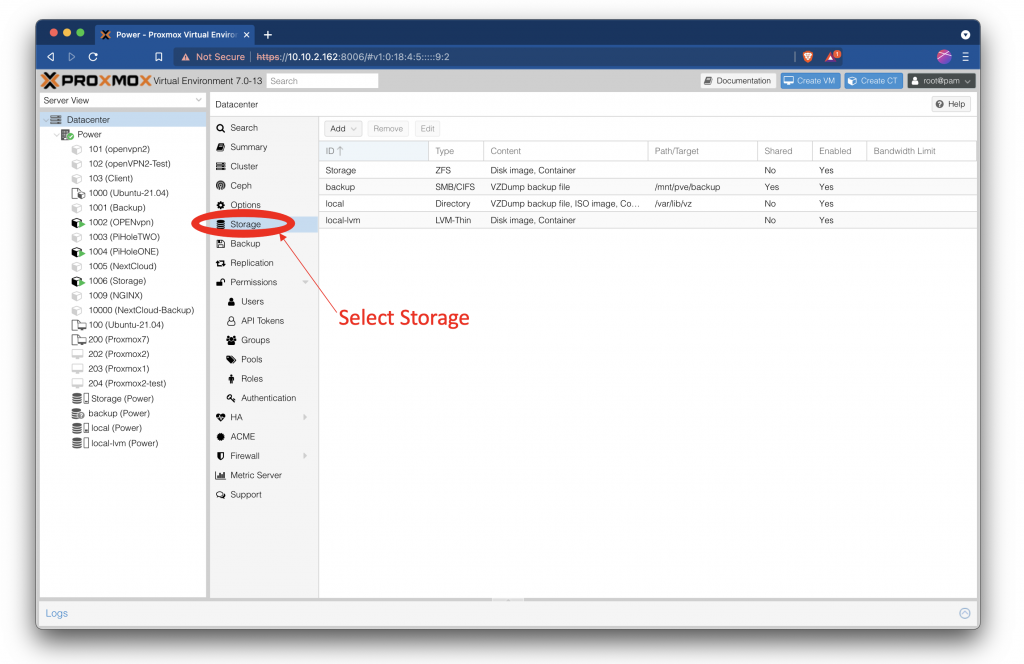
After you are in Datacenter, you will select storage.
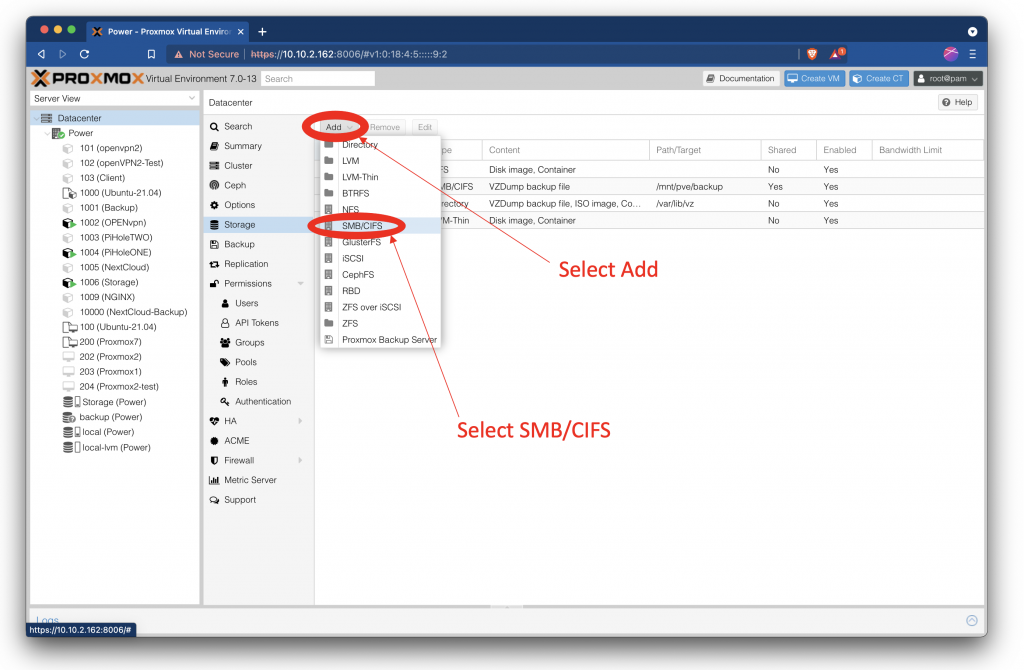
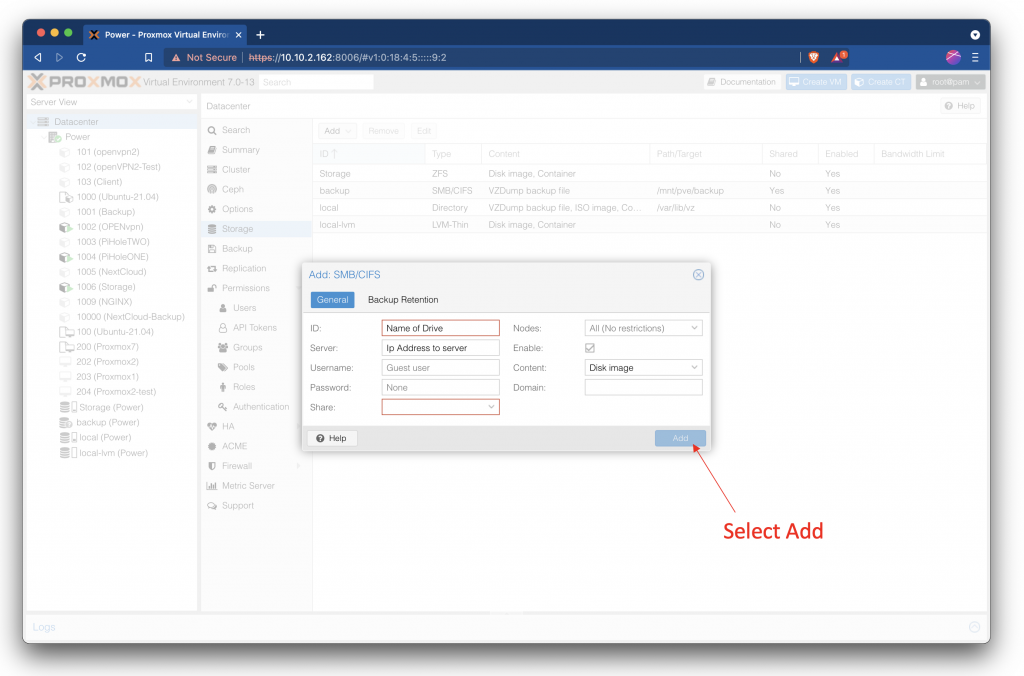
Now that you are in storage tab of Datacenter it is time to click add and select SMB/CIFS to start adding your samba server to the Proxmox 7 web interface.
You are going to have to fill out some fields inside of this tab the first one is ID this is that name that would like to call this drive in the web interface. the next one is server this is the IP of your server, Username is the username for your server login, password is the password for the server login. the last one on the left is Share this will be the shared folder that you have setup in your SMB server config file. The on the right you will need to tell Proxmox what you are doing with the server in the Content drop down.
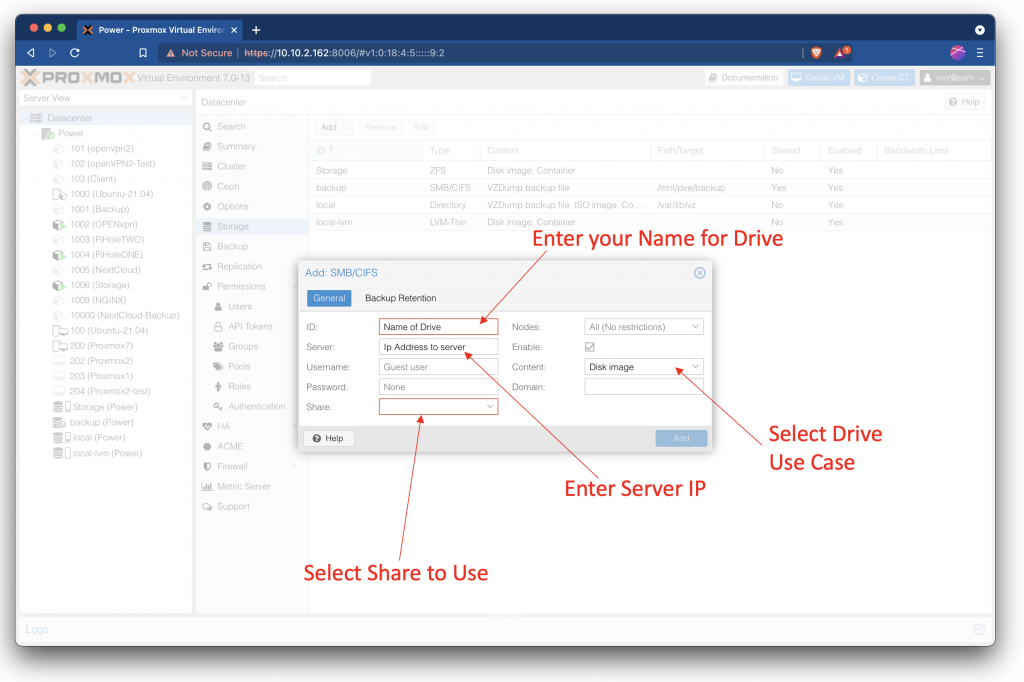
After you have filled out all the fields in the add SMB/CIFS tab it is time to click ADD and you should see the new drive appear in the Server View window.
One reply on “Add SMB Share Using Just Web Interface Proxmox 7”
How would you do this where the content is media files?