In one of our more recent videos we had some comments asking about how to add a USB Ethernet controller to their proxmox server. We felt we covered this thoroughly in that video but with some confusion from our viewers we thought it might be a good idea to make a separate tutorial and video about how to do that. If you’re here reading this you’re probably looking to find out just how to add a USB Ethernet port. So read along and find out how to add it.
Using The Web Interface
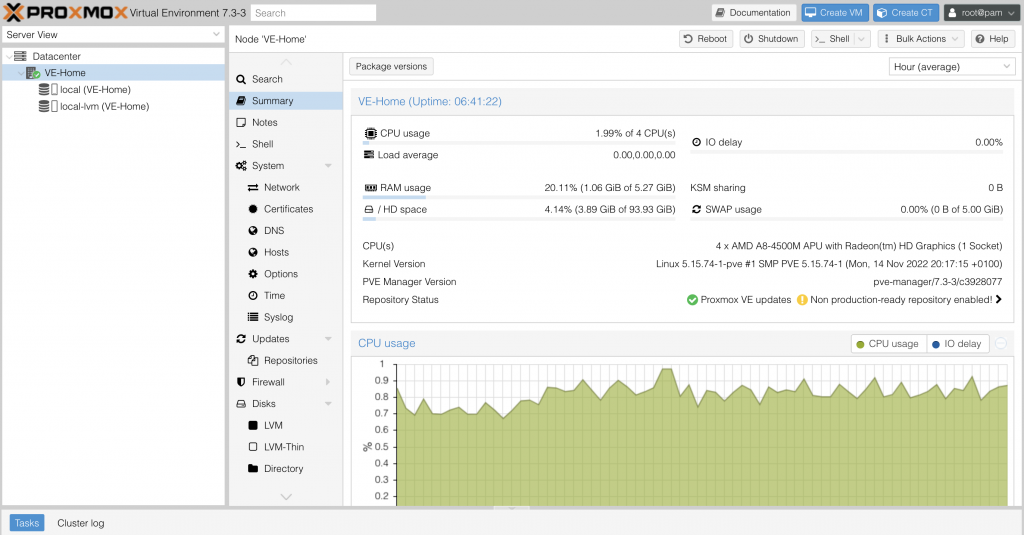
The first thing you’re going to need to do is log into your Proxmox web interface using the login you setup during your Proxmox installation.
You have logged in you’ll get a screen like you see in the picture below.
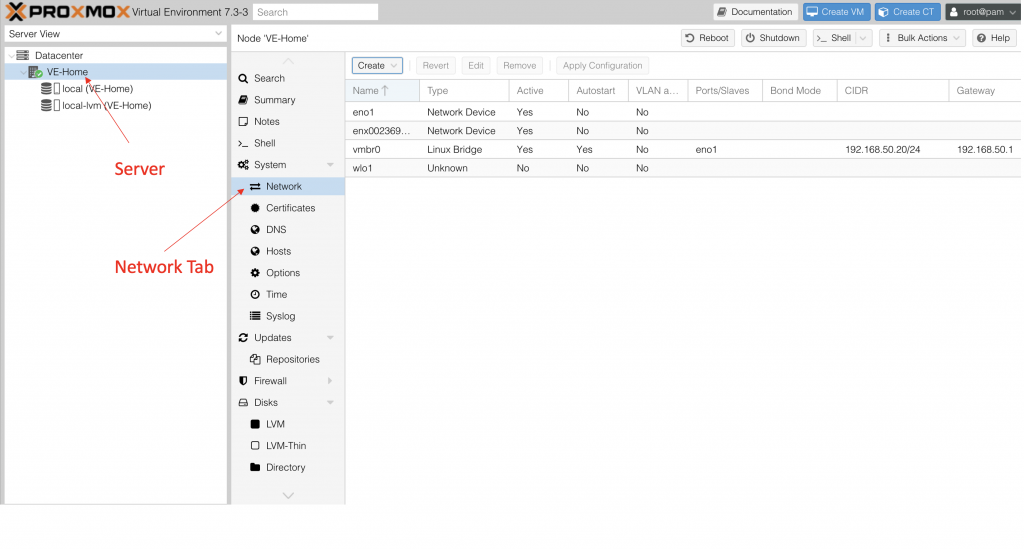
Now that you have logged in it’s time to start your configuration. The first thing you’re going to need to do is select your server in the picture below we have placed a red arrow pointing at where you need to do just that. Then you’re going to need to select the network tab we have also placed a red arrow at where you Click to do that.
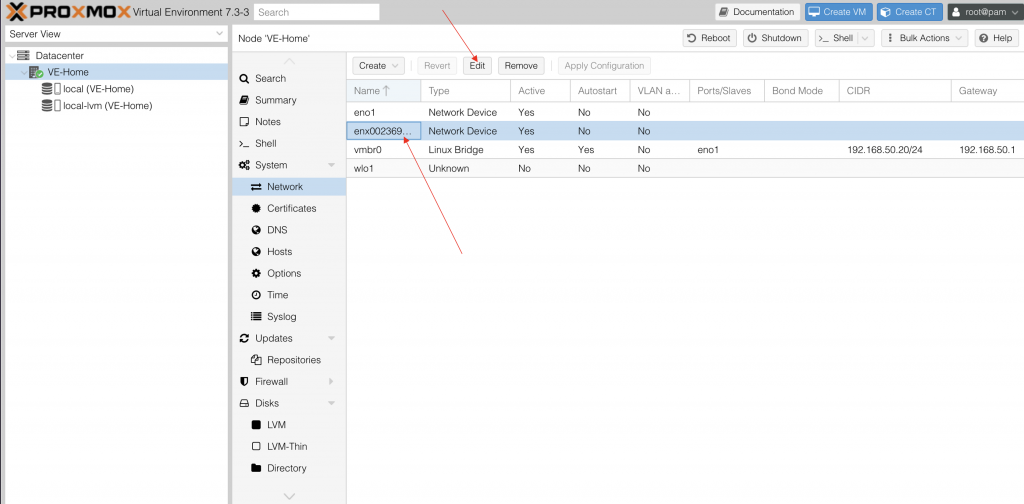
The first thing we like to do get the name of our newly added Ethernet port this is the name that our server assigns to it when we plug it in. In the picture below we have placed arrows showing you the steps you need to take to do this. The first step is going to be to select the network port by clicking on it you should see the color change that is around the network port name. Then we’re going to click edit.
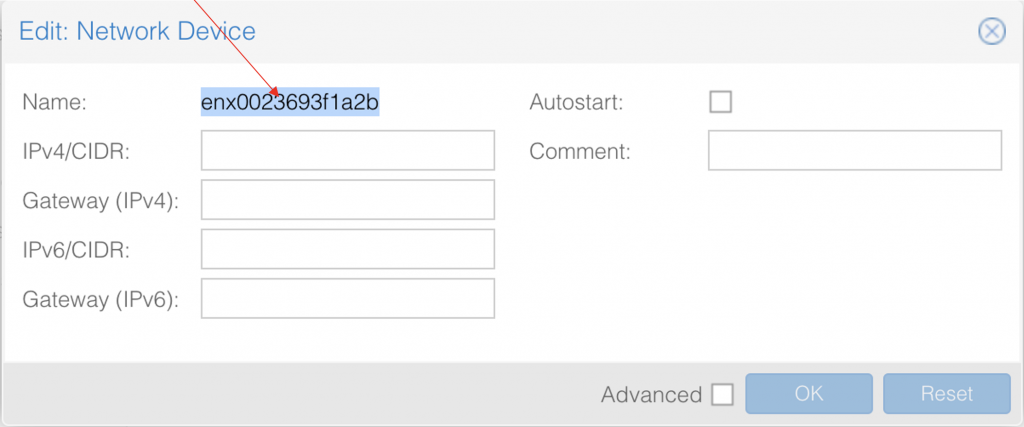
Once you have pressed edit you will get a dialog box that looks like the one below inside of the dialog box you’ll see the name of your Ethernet port go ahead and select it highlight it so it looks like it does in the dialog box below. Then use your shortcut keys for copy either control C if on a windows system or command C if on a Mac.
Now that you have the name of your Ethernet port stored in your clipboard it’s time to start setting U your new Linux bridge. Bridgeworks kind of like a hub or a switch it allows you to virtually distribute network connections to your VMS or containers inside of your Proxmox server.
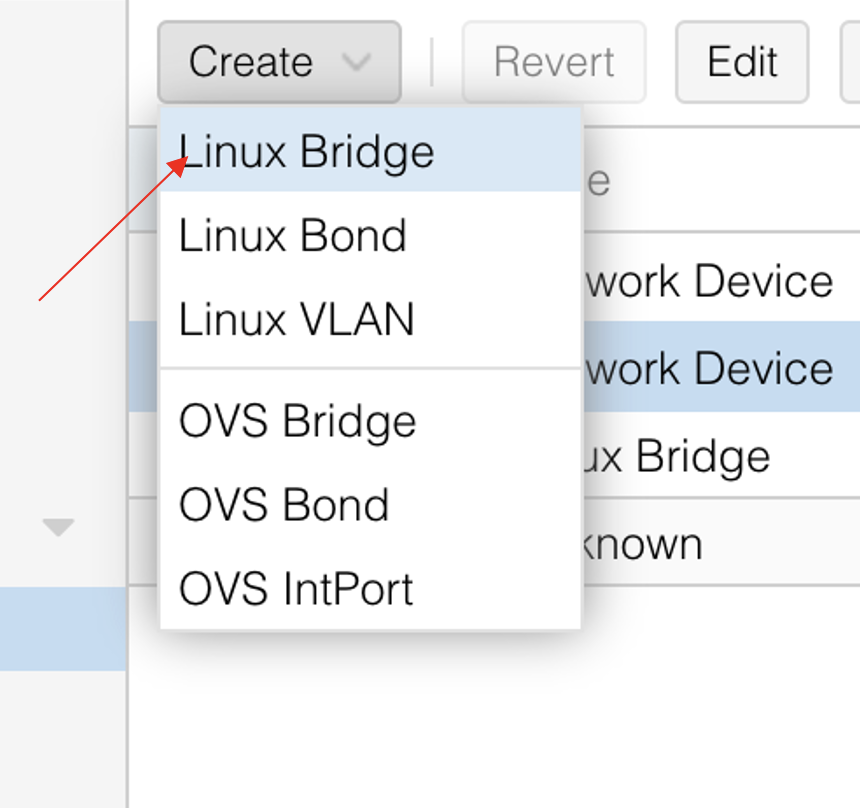
To start creating your virtual bridge you’re going to click the create button in the picture below we have placed an arrow facing at the button.

Now click Linux bridge again we have placed an arrow pointing at where you need to click.
Now you should see a dialog box click the one in the picture below. Let’s start by clicking in the data field labeled bridge ports and pasting in the Ethernet ports name that we wish to correct to this bridge. You can do that on a Mac by using command V or on a windows system by using control V.

Now only one bridge or Ethernet port on your proxmox system can have a gateway IP address this is important to remember because it can create errors if trying to add multiple ports with gateway IP addresses. Not all bridge ports have to have an IP address but if you intend on using the bridge port to communicate with your proxmox system via the web interface you will need an IP address. If you assign no IP address you cannot use that connection for communication with your proxmox server.
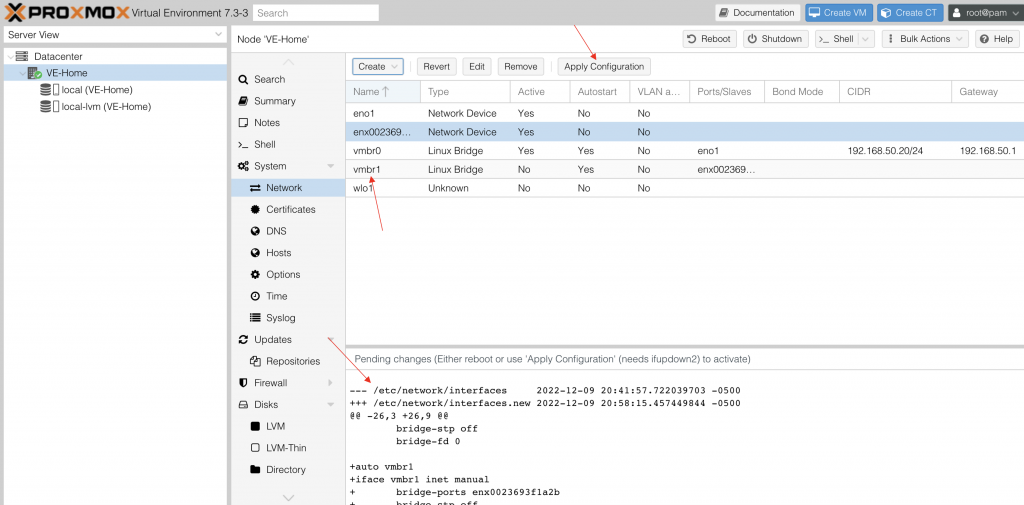
Now that you’ve clicked create you’re ready to apply the configuration to your proxmox server but but before you do that let’s look at this screen that you will see next in the picture below notice that we haven’t read arrow pointing at the lower right hand corner of the screen this is the information that will be added to your network interfaces file the file that controls or tells the server about its Ethernet ports. Notice in the mid upper right hand side of the screen you’ve also had a Bridgeport called VMBR 1 added this is your new Bridgeport that you will use for your VMS or containers as you wish. Now that you’ve checked everything over and you’re satisfied with the work you’ve done go ahead and click apply configuration with that being done you’re ready to start using you’re new Bridge port on your proxmox server.
Below you will find a link to a YouTube video that walks you through doing the exact process described above, enjoy.