it is quite simple to add a Samba share to Proxmox as a storage drive. You are going to need to open you Proxmox web interface and start a shell session link below.
Now with your shell session started you can start entering commands the first command that you need to enter i
$ apt install cifs-utils -y
After cifs-utils is installed you can enter the command
$ mkdir /media/share
This command will make a folder called share in the media directory.
Now it’s time to make the file that’s going to hold credentials for the login of SMB share. to do this were going to use nano text editor by running the command.
$ nano ~/.smb
Now place the contents below in the file. SMB_username equals the username of your SMB login, SMB_password equals the password of your SMB login.
username=smb_username
password=smb_password
Press ctrl + x, Y to save and Enter
Now it is time to use nano one more time to edit a system file called fstab
$ nano /etc/fstab
and were going to add the below line to the fstab system files.
//[ip of server]/[name of share] /media/share cifs credentials=/root/.smb,users,rw,iocharset=utf8
IP server equals the IP address to your SMB share, and name of share equals the name that you have called the share when configuring your SMB server.
Your last step is going to need to run the below command this command mounts the added storage directory to your products on server.
$ mount -a
There you have it you have successfully mounted your SMB share to your Proxmox server but you can’t yet begin working with this share using your Proxmox web interface or your Proxmox commands because we have not yet configured Proxmox to use this share.
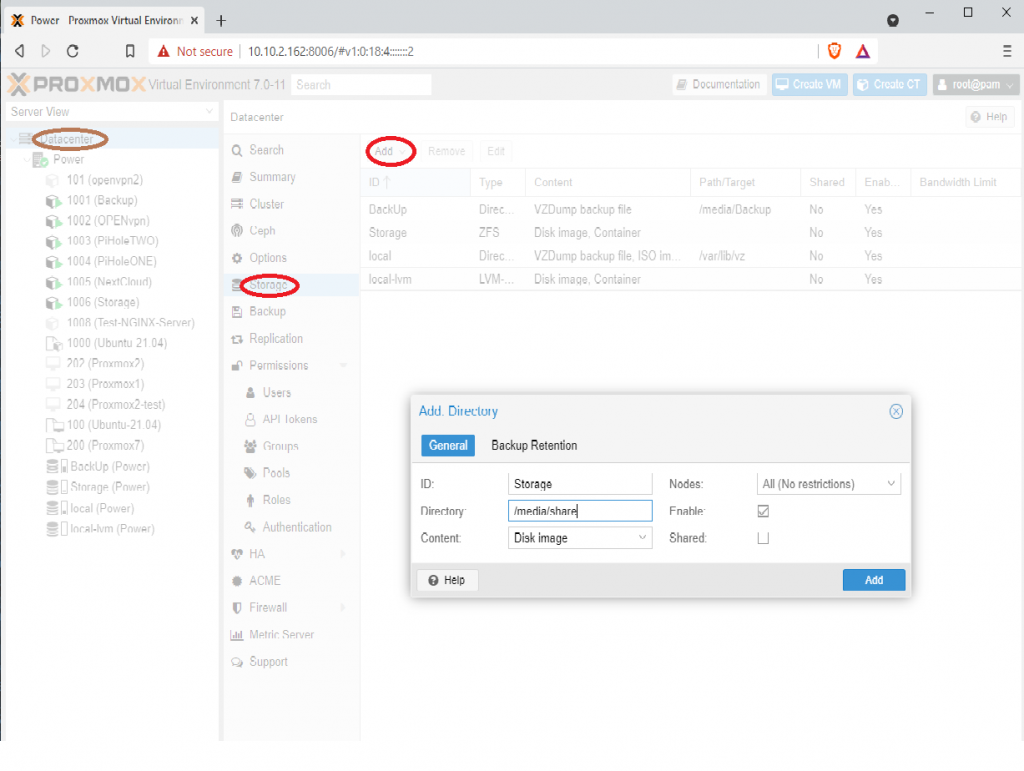
To do this were going to head back to our Proxmox web interface and select the datacenter drop-down in the left-hand corner. Now that we have selected the datacenter we can move to the next column and select storage. With storage selecting you should see a screen appear with three buttons at the top were going to press the add button select directory, and fill out the ID with our desired name for the storage. then fill out the directory as the mount path that we as configured in the previous tutorial in our case it’s going to be /media/share.